When we moved into our home, we knew a renovation to our closet space was a need. While it’s by no means the smallest closet in the world, it’s also pretty far from the biggest. And worse, the way the racks were hung (too close together, too close to the ground, overlapping) meant we could use less than half of them to actually hang our clothes.
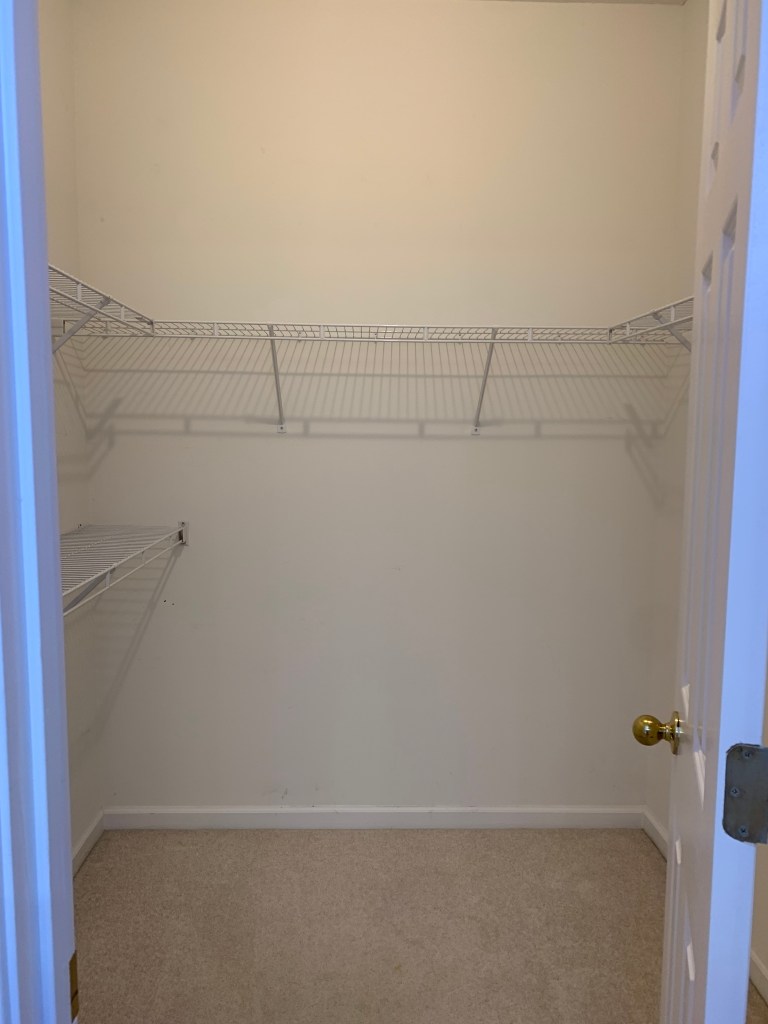
Because we knew a closet renovation was coming, we allowed things to get pretty out of hand. I never purchased a shoe rack since we were planning on a custom shoe shelf, so my shoes lived in a massive pile spilling out of one of the corners. Clothes that didn’t fit in our drawers piled onto shelves. A few boxes that we never unpacked from the move took up space on some of the higher shelves.
And we lived that way for two years.
Other renovations had gotten in the way. Life had gotten in the way. And if we’re honest, we had lost some of the passion and excitement that had propelled us forward when we first moved in, which meant we were letting more and more time elapse between projects.
Finally, enough was enough. We moved all of our clothes to the guest room and started pulling racks and baseboards off the walls. A few rounds of wall patching and a coat of paint later, we were ready for the new closet!
We had originally thought we were going to have an IKEA closet. My Pinterest was full of people who had put in Pax closets and loved them, why shouldn’t we?
I designed my closet, and then the sticker shock set in. $1500 (pre tax) for a pretty small footprint was more than I was expecting. To make it worse, not all the pieces I needed were in stock, and the timeline for when they would be back in stock wasn’t clear.
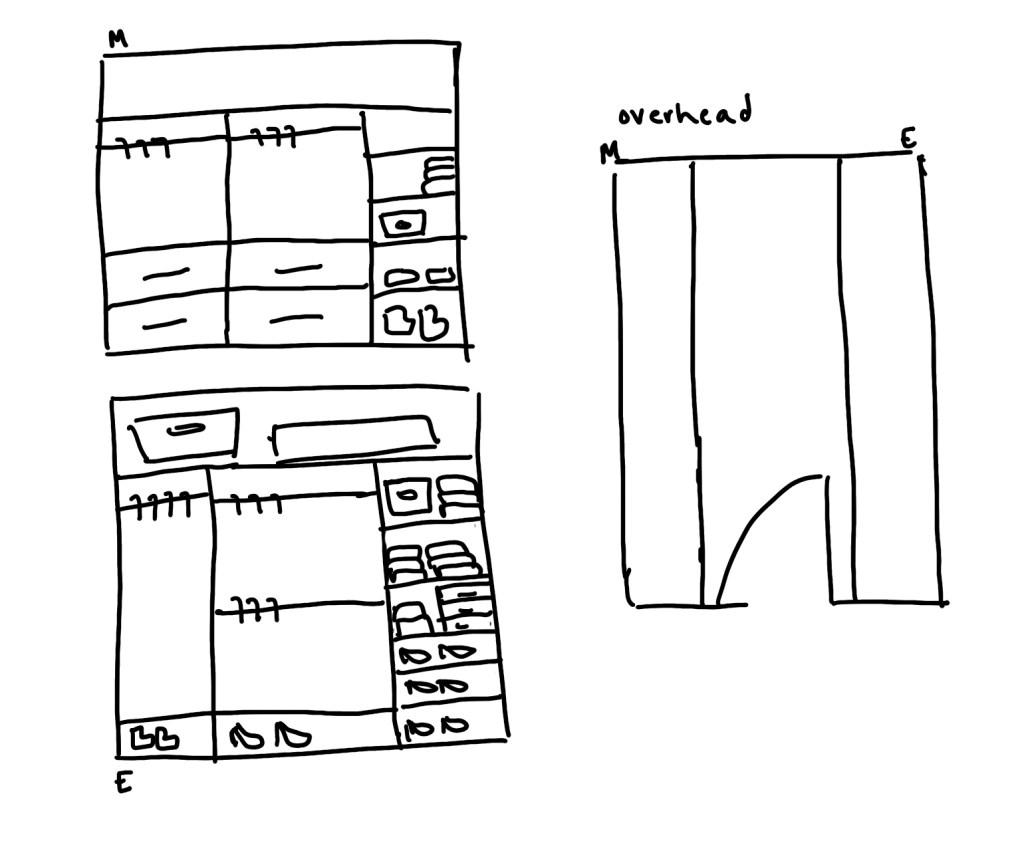
After that, we knew we were going to have to build ourselves. So, I drew up a sketch of what I thought the closet should look like in Procreate.
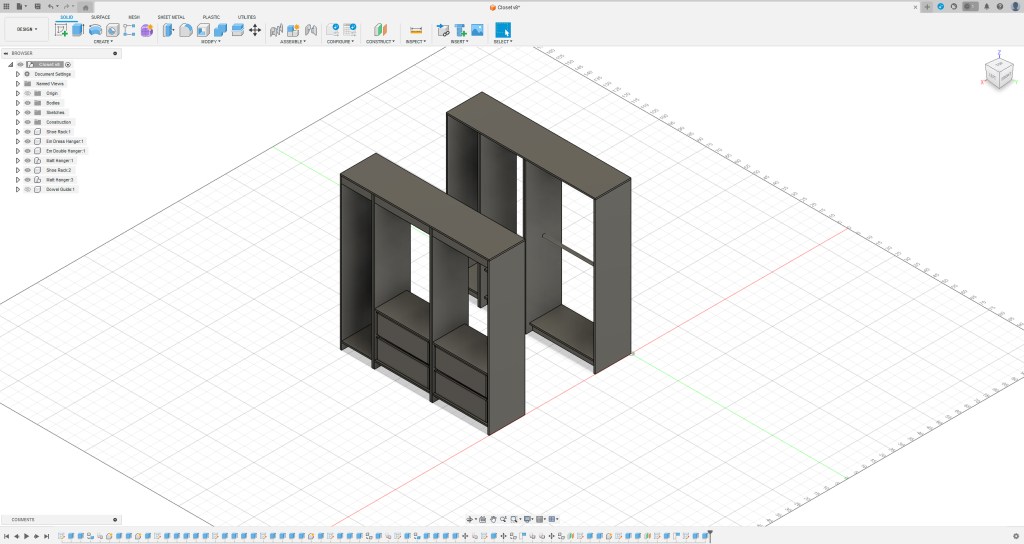
Matt took that sketch and made a 3D rendering on Fusion 360, taking into account the actual measurements of the room. I’m 5’2 and Matt is 6’, so we measured the height of the rails based on my maximum reach, not his.
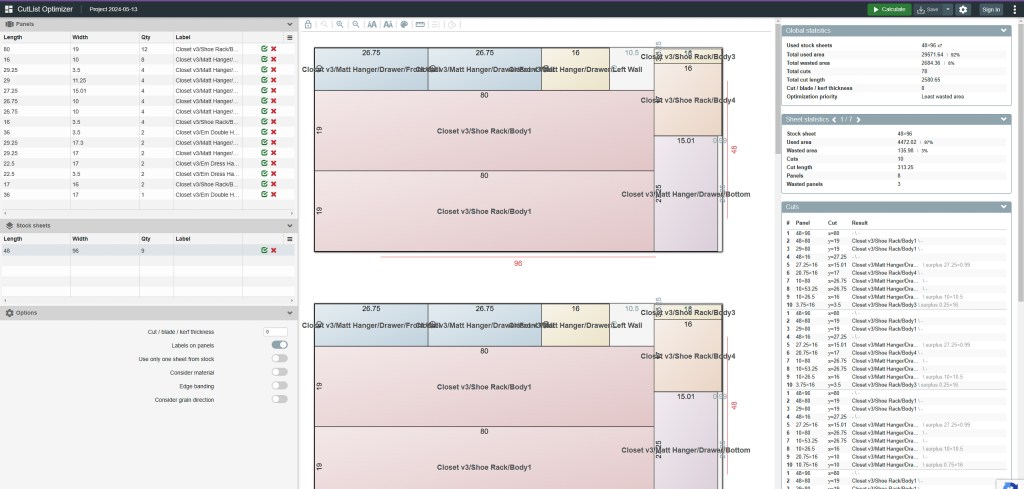
He used a tool called Cutlist Optimizer that took his rendering, and told us how many sheets of birch plywood we needed and where to make the cuts in order to most efficiently use the pieces. I love that this saved us money, and also saved time and waste.
Matt based the design for the closet from the tutorial in this YouTube video. This is the most complicated thing he has built before, and the video guided him well through the process of creating to closet boxes and drawers.
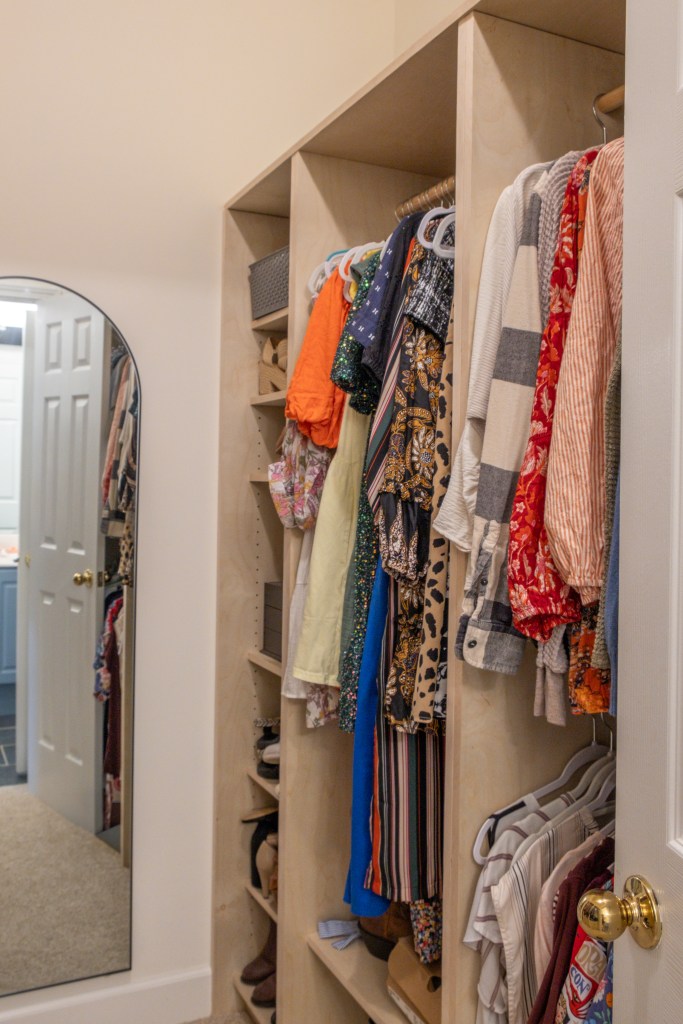
We built each side of the closet in three sections, based on our own preferences. Matt wanted a few sets of drawers. I wanted a longer hanging section for my dresses, and a double rod for shirts so I could fit more in the small space.

We each have a section of adjustable shelves at the end of the closet for shoes and baskets of smaller items.
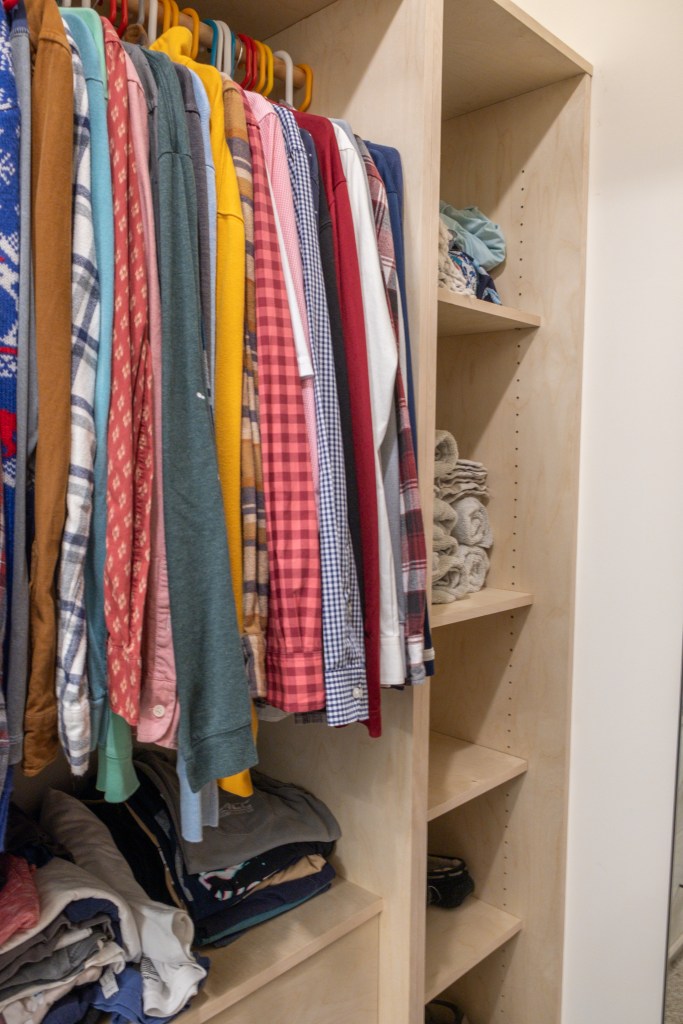
For right now, the top of the closet is empty, but we made sure it had a secure top shelf so that, if needed, we could use it for storage of items that are infrequently used (since I would need a stepstool to reach).
After all the sections of the closet were done, we replaced the baseboards with a more chunky, modern baseboard (that conveniently hides the damage to the walls from removing the old baseboards). Then we hung the mirror that had been living in the corner of our bedroom.
Now I’m able to get ready every morning without leaving my closet! Before, I would spend the morning moving back and forth from the mirror in the bedroom to the closet. Matt’s happy that I won’t bother him so much every morning when I’m getting ready for work and he’s still asleep!
We’re so happy with how the closet turned out! I’ve been just sitting in the room and enjoying how pretty and organized it is. For anyone who is looking to do similar but is worried that it’s just too hard without real experience, the most complicated woodworking project Matt had undertaken before was building some cabinet fronts. If you have the tools (or can rent them) and have the time, you can turn your closet into something spectacular on a small budget, even if you aren’t sure what you’re doing.
After feeling pretty bogged down over the last few months with the projects we’ve had at the house, this was just the motivation we needed to keep moving forward. We’re excited to move on to our next project!


Leave a comment